Thursday, March 15, 2012
Monday, November 14, 2011
Half a year in a roll of film
I have a film camera, a delightful little semi-automatic SLR with manual aperture and focus controls.

Click here for large size image
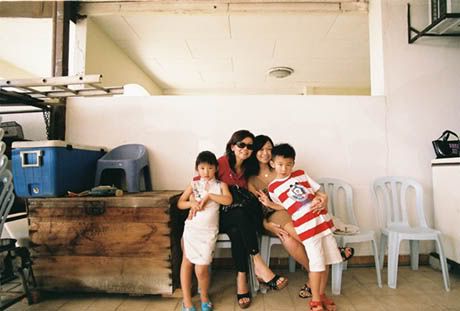
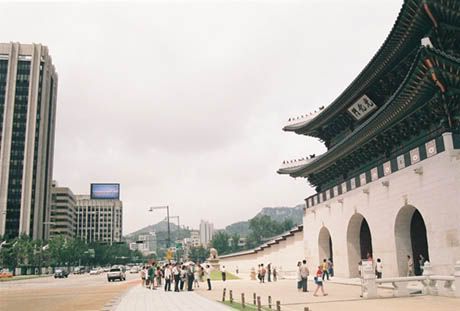
Every now and then, I will persuade myself that this function/ event I’m going to is going to be great and I should bring my camera… my FILM camera. But when I get there there’s not so much going on that justifies squeezing off a RM 0.65 shot so I usually end up with a photo or two, sometimes 5. The small number of photos and my boring social calendar means it takes about 6 months for a roll of film to be used, by then I’m a bit jaded by the hassle and lack of instant-ness of film.

Click here for large size image
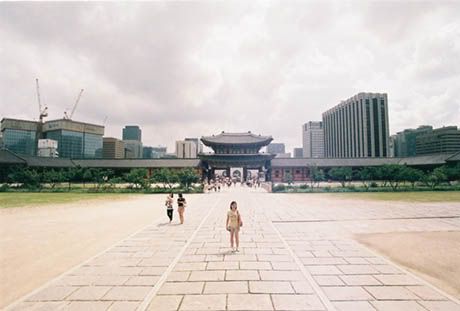
I get the roll developed and scanned, and immediately get stunned by the vividness of it. The dynamic range is fantastic – there simply are no blown-out areas, and the tonal gradients look rather pleasing.

Click here for large size image
It also helps with my composition that I take extra care to squeeze the trigger when RM 0.65 is on the line, so I end up with a higher proportion number of better photos.
I should... will take the film camera out more.

Click here for large size image
Every now and then, I will persuade myself that this function/ event I’m going to is going to be great and I should bring my camera… my FILM camera. But when I get there there’s not so much going on that justifies squeezing off a RM 0.65 shot so I usually end up with a photo or two, sometimes 5. The small number of photos and my boring social calendar means it takes about 6 months for a roll of film to be used, by then I’m a bit jaded by the hassle and lack of instant-ness of film.

Click here for large size image
I get the roll developed and scanned, and immediately get stunned by the vividness of it. The dynamic range is fantastic – there simply are no blown-out areas, and the tonal gradients look rather pleasing.

Click here for large size image
It also helps with my composition that I take extra care to squeeze the trigger when RM 0.65 is on the line, so I end up with a higher proportion number of better photos.
I should... will take the film camera out more.
Labels: personal, photographic equipment, photography
Wednesday, September 08, 2010
Anaglyph
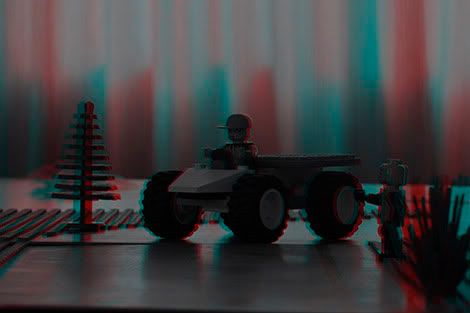
A few days ago, Panasonic launched an advertisement blitz across various newspapers for their 3D HDTV. Red-cyan 3D glasses were supplied with the anaglyphic advertisements.
Dig yours out, because the following still life is an anaglyph-

Lego Men
Large size better for stereo vision
Dig yours out, because the following still life is an anaglyph-

Lego Men
Large size better for stereo vision
Labels: photography
Saturday, July 24, 2010

Bitter Gourd is sad because the Garlics refuse to play with it
Elitist bastards
Click here for large size image
Labels: photography
Thursday, June 03, 2010
Thursday, May 13, 2010
The background story on how to imitate the Minolta/Sony Smooth Transition Focus bokeh on regular, large-aperture lenses
This is an investigation of a concept, not the actual building process. This article will involve more mathematics than you’d probably care to read.
Basis of the STF
The STF lens is an innovative lens by Minolta (and now marketed by Sony) that gives exceptionally smooth bokeh by using a piece of grey-coloured glass to regulate light fall-off of the bokeh.
Very simply, this works by making the circle of confusion’s (the bokeh) brightness gradually fade. This is in contrast to normal lenses where the circle of confusion is a very well defined circle (or hexagon/pentagon/octagon, if the aperture blades are slightly closed).
The results are very smeared circles of confusion, as illustrated by the comparison images below.
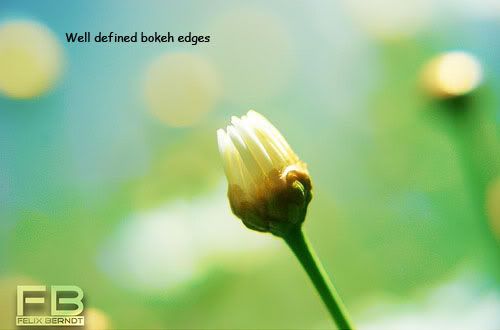
Photo using a regular, large aperture lens

Photo using an STF lens
The design and ingenuity behind the STF mechanism is described here, with lots of sample photos from the STF lens.
Existing imitation techniques
On Minolta Dynax 7 film cameras, the STF’s smooth bokeh can be mimicked by taking seven exposures on one frame, each exposure with a smaller aperture size. This results in circle of confusions with bright centres and progressively dimmer towards the edge.
Alternatively, a long exposure can be made in dim lighting with the camera mounted on a tripod. The aperture ring can then be manually turned to reduce the aperture over the entire duration of the exposure. For this approach, manual lenses with no aperture clicks are most suitable.
Proposed filter-based mimickery
Here, I propose using a lens filter to reproduce the light falloff that an STF lens’s coloured lens. If a filter can be darkened at the edges to allow a gradual light falloff, then the resulting bokeh will have a similar falloff characteristic. The falloff can be controlled by adjusting the darkness of the glass at different distances from the centre.
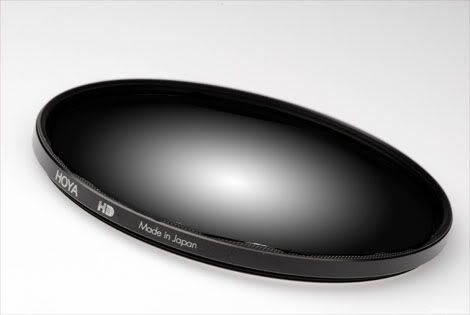
Proposed concept: radial gradient neutral density filter
This filter-based approach has been used to shape bokeh, resulting in heart, star, square shaped bokeh:
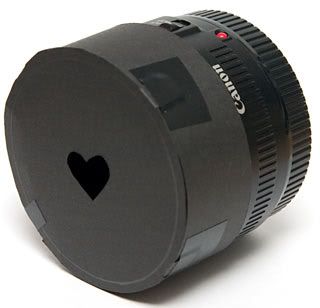
A heart-shaped bokeh filter
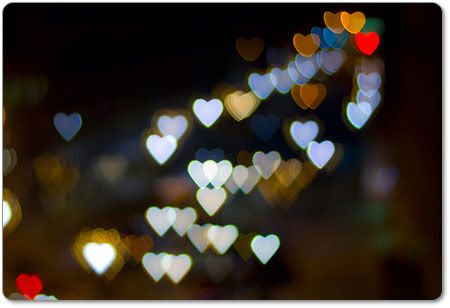
Result from a heart-shaped bokeh filter: circle of confusion (bokeh) partially obscured, resulting in heart shape
Light falloff modelling
Light falloff on the proposed radial ND filter can be done by attempting to mimic the STF lens’s material thickness and how it absorbs light.
The first assumption would be to make an approximation of the filtering element’s lens shape. It is reasonable to assume that the lens is a spherical lens, since spherical lenses are generally much easier to cut than other aspherical shapes.
Based on schematics by Minolta (above), the lens’s geometry can be scaled to a common distance scale based on the lens’s radius:
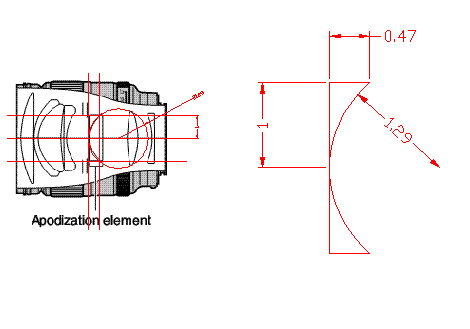
Approximating the coloured glass's dimensions
Lens radius: 1.00r
Lens thickness at centre: ≈ 0
Lens thickness at edge: 0.47r
Sphere radius: 1.29r
After some geometric manipulation, the lens thickness can be expressed by the equation

which describes the lens thickness, t, at a particular radius, r.
To calculate the optical density of the glass, it’s useful to note that the aperture number of the Minolta STF lens is f/2.8, but the amount of light let in is equivalent to f/4.5 (the lens’s name is 135mm f2.8 [T4.50] STF). This can tell us that the coloured lens removes approximately 1.4 stops of light, from the following relation:
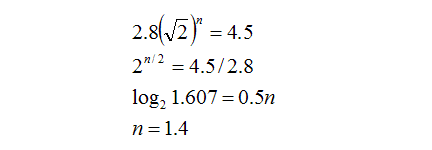
If by removing 1.4 stops of light, this means that only 0.51.4 (39%) of the incoming light passes through; the rest is absorbed by the coloured glass.
In order to select the correct optical density for the filter to match Minolta’s design, we need to match the total light transmitting through the filter to be similar to what Minolta has for the STF lens (39%).
Arbitrarily assuming that the edge of the lens removes p stops of light passing through (similar to the dynamic range of slide film), and using the knowledge that the glass thickness and optical density is proportional, the number of stops removed at a particular radius can be expressed as:
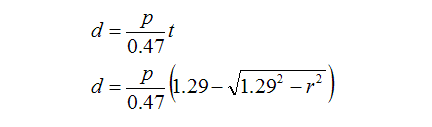
(0.47 is the thickness of the edge of the coloured lens)
This means that for light passing through any portion of the lens, the quantity that passes through can be expressed as 0.5d. To calculate the total amount of light passing through the entire lens, we need to add intensities of all the different rays of light coming through (some rays weakened due to passing through lots of dark glass, some rays not so weak due to passing through less glass).
The integral below does that:
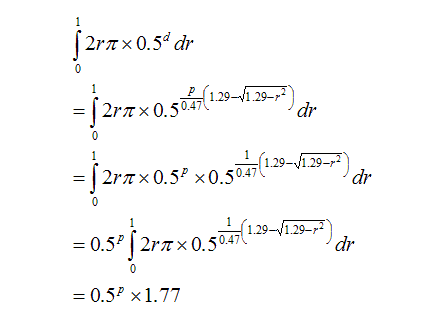
To find the value of p, the above equation needs to match the transmissivity of the Minolta’s coloured lens, which is 39%.
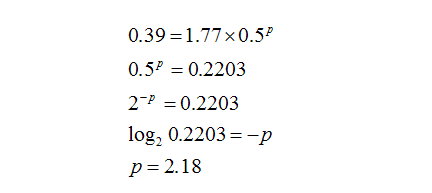
Therefore, the edge of the filter needs to absorb 2.18 stops of light, letting through 22%, while the centre practically lets everything through.
For the proposed filter to match the light falloff of the STF’s bokeh, the filter’s darkness needs to be the same as the STF’s coloured lens. Therefore, the same equation can be used to describe the filter’s darkness at all radiuses:
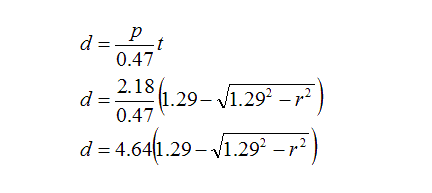
For this equation, the length scale is set such that the filter’s radius is 1.00.
Having obtained the proper light falloff characteristic and the relationship between optical density and radius for the filter, the filter can be constructed. This article will be continued as progress is made during construction.
Basis of the STF
The STF lens is an innovative lens by Minolta (and now marketed by Sony) that gives exceptionally smooth bokeh by using a piece of grey-coloured glass to regulate light fall-off of the bokeh.
Very simply, this works by making the circle of confusion’s (the bokeh) brightness gradually fade. This is in contrast to normal lenses where the circle of confusion is a very well defined circle (or hexagon/pentagon/octagon, if the aperture blades are slightly closed).
The results are very smeared circles of confusion, as illustrated by the comparison images below.

Photo using a regular, large aperture lens

Photo using an STF lens
The design and ingenuity behind the STF mechanism is described here, with lots of sample photos from the STF lens.
Existing imitation techniques
On Minolta Dynax 7 film cameras, the STF’s smooth bokeh can be mimicked by taking seven exposures on one frame, each exposure with a smaller aperture size. This results in circle of confusions with bright centres and progressively dimmer towards the edge.
Alternatively, a long exposure can be made in dim lighting with the camera mounted on a tripod. The aperture ring can then be manually turned to reduce the aperture over the entire duration of the exposure. For this approach, manual lenses with no aperture clicks are most suitable.
Proposed filter-based mimickery
Here, I propose using a lens filter to reproduce the light falloff that an STF lens’s coloured lens. If a filter can be darkened at the edges to allow a gradual light falloff, then the resulting bokeh will have a similar falloff characteristic. The falloff can be controlled by adjusting the darkness of the glass at different distances from the centre.

Proposed concept: radial gradient neutral density filter
This filter-based approach has been used to shape bokeh, resulting in heart, star, square shaped bokeh:

A heart-shaped bokeh filter

Result from a heart-shaped bokeh filter: circle of confusion (bokeh) partially obscured, resulting in heart shape
Light falloff modelling
Light falloff on the proposed radial ND filter can be done by attempting to mimic the STF lens’s material thickness and how it absorbs light.
The first assumption would be to make an approximation of the filtering element’s lens shape. It is reasonable to assume that the lens is a spherical lens, since spherical lenses are generally much easier to cut than other aspherical shapes.
Based on schematics by Minolta (above), the lens’s geometry can be scaled to a common distance scale based on the lens’s radius:

Approximating the coloured glass's dimensions
Lens radius: 1.00r
Lens thickness at centre: ≈ 0
Lens thickness at edge: 0.47r
Sphere radius: 1.29r
After some geometric manipulation, the lens thickness can be expressed by the equation

which describes the lens thickness, t, at a particular radius, r.
To calculate the optical density of the glass, it’s useful to note that the aperture number of the Minolta STF lens is f/2.8, but the amount of light let in is equivalent to f/4.5 (the lens’s name is 135mm f2.8 [T4.50] STF). This can tell us that the coloured lens removes approximately 1.4 stops of light, from the following relation:

If by removing 1.4 stops of light, this means that only 0.51.4 (39%) of the incoming light passes through; the rest is absorbed by the coloured glass.
In order to select the correct optical density for the filter to match Minolta’s design, we need to match the total light transmitting through the filter to be similar to what Minolta has for the STF lens (39%).
Arbitrarily assuming that the edge of the lens removes p stops of light passing through (similar to the dynamic range of slide film), and using the knowledge that the glass thickness and optical density is proportional, the number of stops removed at a particular radius can be expressed as:

This means that for light passing through any portion of the lens, the quantity that passes through can be expressed as 0.5d. To calculate the total amount of light passing through the entire lens, we need to add intensities of all the different rays of light coming through (some rays weakened due to passing through lots of dark glass, some rays not so weak due to passing through less glass).
The integral below does that:

To find the value of p, the above equation needs to match the transmissivity of the Minolta’s coloured lens, which is 39%.

Therefore, the edge of the filter needs to absorb 2.18 stops of light, letting through 22%, while the centre practically lets everything through.
For the proposed filter to match the light falloff of the STF’s bokeh, the filter’s darkness needs to be the same as the STF’s coloured lens. Therefore, the same equation can be used to describe the filter’s darkness at all radiuses:

For this equation, the length scale is set such that the filter’s radius is 1.00.
Having obtained the proper light falloff characteristic and the relationship between optical density and radius for the filter, the filter can be constructed. This article will be continued as progress is made during construction.

Labels: applied mathematics, applied science, photographic equipment, photography
Wednesday, April 28, 2010
Saturday, February 27, 2010
Thursday, February 25, 2010
When Kuala Lumpur orgasmed
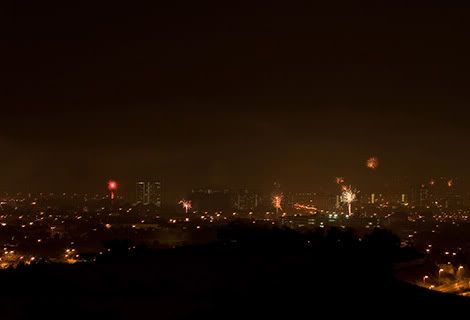
On the eighth night of the Lunar Year, Kuala Lumpur arched her back in a loud and frantic display of light and sound that went on till the early hours of the next day.
The action started on a sedate pace, with occasional bursts of fireworks and popping noises from distant unseen crackers. After half an hour of foreplay, the sky began to light up with showers of golden light accompanied with ever more frequent booms.

Click here for large size image
The noise... the noise was something to behold. It sounded like a pair of very active humans copulating noisily upon a wobbly bed that was attached to the pedal of a drum set.

Click here for large size image
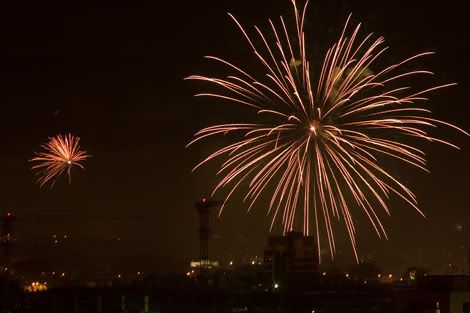
The booming went on and on, just below the threshold of climaxing. For the whole of half an hour, the imaginary wobbly bed and the drum set kept on booming. Sometimes gently, sometimes with such ferocity that the noise reverberated off the façade of apartment blocks.
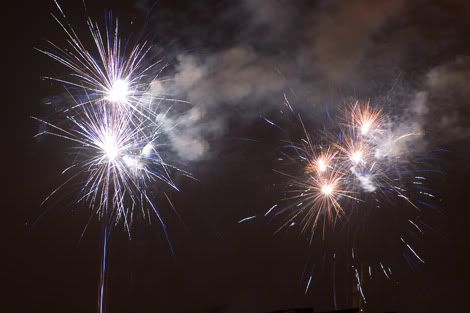
And then they scaled it; they were beyond the threshold. The imaginary couple really saw fireworks. The sky erupted in light and magic accompanied by the frantic booming of explosions.

Click here for large size image
The eruption of sensations was electric. Across the sky, flashes of orange, green, purple, red, blue and yellow appeared like sugar sprinkles on a birthday cake, and quickly faded away as gracefully as a swan paddling on the Lake Baikal. Glowing embers flung by the explosions drew squiggly lines on photographic films, looking very much like hopelessly lost sperm cells in a rectum.

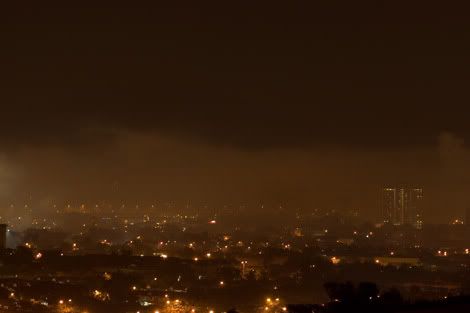
When it was over, entire districts and townships were left blanketed in a light soothing haze that smelled of explosives.

Click here for large size image
The action started on a sedate pace, with occasional bursts of fireworks and popping noises from distant unseen crackers. After half an hour of foreplay, the sky began to light up with showers of golden light accompanied with ever more frequent booms.

Click here for large size image
The noise... the noise was something to behold. It sounded like a pair of very active humans copulating noisily upon a wobbly bed that was attached to the pedal of a drum set.

Click here for large size image
The booming went on and on, just below the threshold of climaxing. For the whole of half an hour, the imaginary wobbly bed and the drum set kept on booming. Sometimes gently, sometimes with such ferocity that the noise reverberated off the façade of apartment blocks.
And then they scaled it; they were beyond the threshold. The imaginary couple really saw fireworks. The sky erupted in light and magic accompanied by the frantic booming of explosions.

Click here for large size image
The eruption of sensations was electric. Across the sky, flashes of orange, green, purple, red, blue and yellow appeared like sugar sprinkles on a birthday cake, and quickly faded away as gracefully as a swan paddling on the Lake Baikal. Glowing embers flung by the explosions drew squiggly lines on photographic films, looking very much like hopelessly lost sperm cells in a rectum.

When it was over, entire districts and townships were left blanketed in a light soothing haze that smelled of explosives.

Click here for large size image
Labels: compositions, photography, vzf (vot ze fick)
Thursday, January 21, 2010
Sunday, August 09, 2009
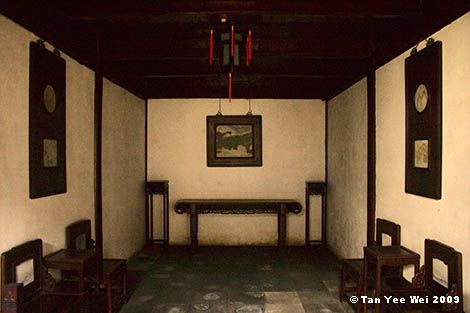
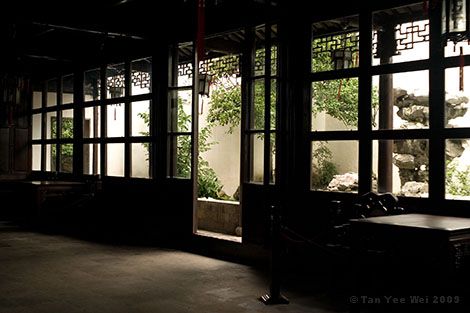
Master of Nets Garden, Suzhou
One of the smaller of gardens in Suzhou, the Master of Nets Garden benefits for a lower entry fee and best of all, is almost entirely overlooked by the busloads of tour groups.
Unlike the case in larger and better known attractions, this garden actually allows visitors to wander about in peace.
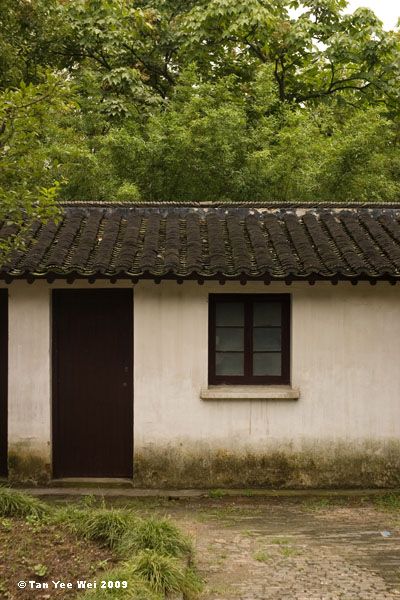
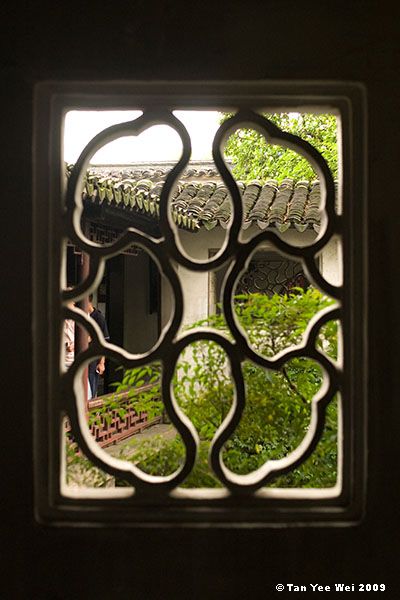
Much of the area is subdivided into rooms, courtyards, pavilions, gardens, walkways and airwells, interconnected with narrow doorways or screened openings/windows. It’s quite amazingly laid out. As one rounds a corner and enters a doorway, the scene changes surprisingly from a stern looking, wide open stone-paved courtyard into a cosy airwell with leafy palms and prickly pines.

Click here for large size image


Click here for large size image
Labels: China, photography
Sunday, August 02, 2009
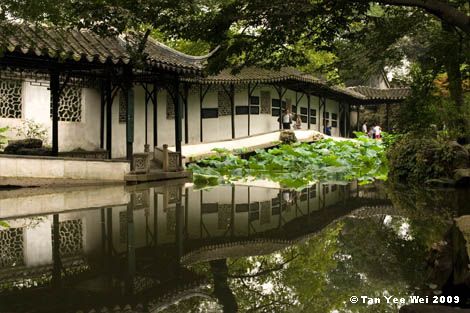
The Humble Administrator's Garden, Suzhou
For the past few weeks, I’ve been working in Suzhou on a particularly nasty engagement. As it’s just 40 minutes away from Shanghai by fast train, I usually return to Shanghai for the weekends to tend to my little fashion boutique.
This weekend, however, I decided to stay around and look at one of the many famed gardens around town. These ancient gardens were mostly the playthings of some wealthy character or other, and have intricate use and separation of spaces. Very architecturally pleasing – a comment which is mostly untrue for modern Chinese constructions.
I was at the Humble Administrator’s Garden. Was beautiful, though the crowd somewhat detracted one’s appreciation of space by filling most of it with bodies and loud chatter.


Click here for large size image
One of the many bodies of water within the garden, with a covered walkway along one side.
This weekend, however, I decided to stay around and look at one of the many famed gardens around town. These ancient gardens were mostly the playthings of some wealthy character or other, and have intricate use and separation of spaces. Very architecturally pleasing – a comment which is mostly untrue for modern Chinese constructions.
I was at the Humble Administrator’s Garden. Was beautiful, though the crowd somewhat detracted one’s appreciation of space by filling most of it with bodies and loud chatter.


Click here for large size image
One of the many bodies of water within the garden, with a covered walkway along one side.

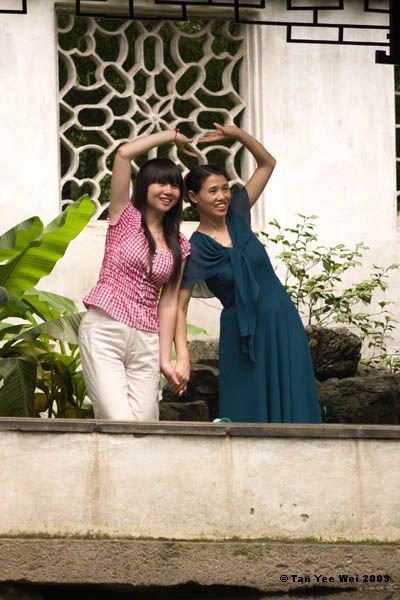
These ladies were posing on the walkway for another camera next to me. I happened to have the 135mm lens on at that time and managed to squeeze off a shot before the scene melted.

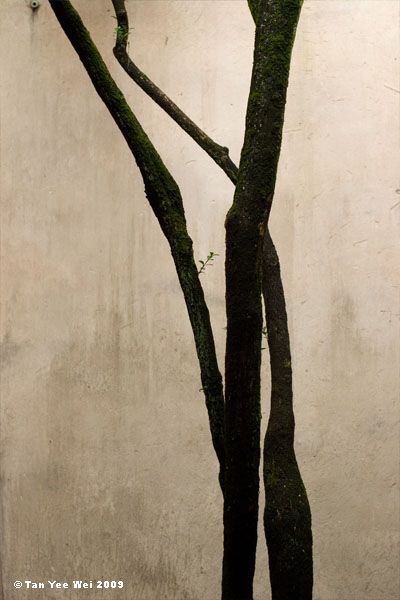
A tree in a courtyard

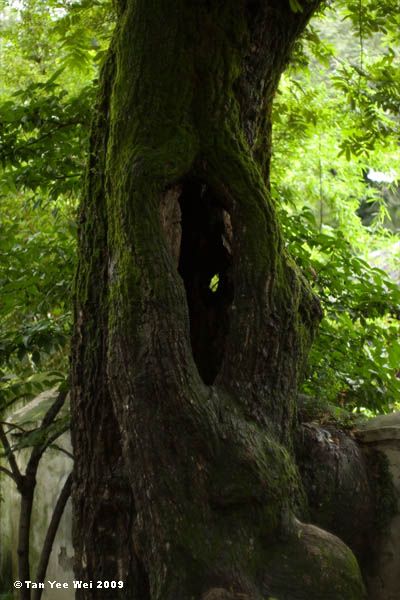
A tree with a vagina

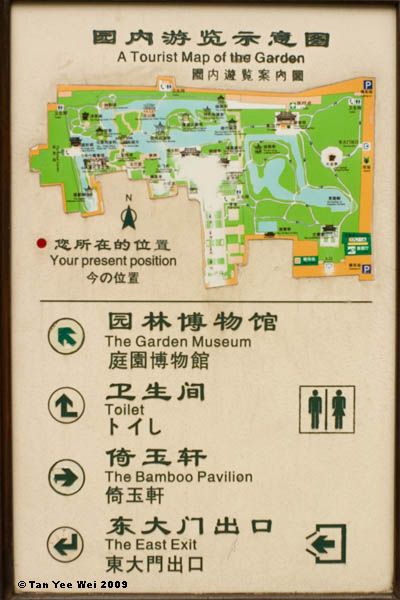
*prods at map with pudgy finger*
“we are here, and that building over there is this. To get out we need to go this way.”
*Drags pudgy finger along map*
After 9000 pudgy finger-prods the map fades, leaving a gaping white hole in place of the red “you are here” dot.

Elaborately framed openings are a common feature here. Most, if not all, are unique designs.

Click here for large size image
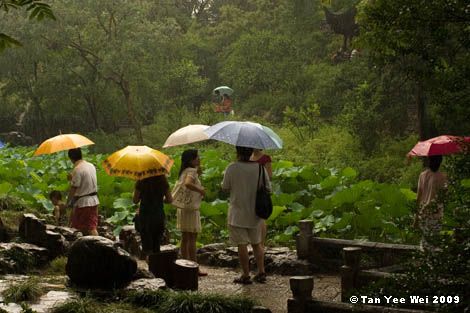
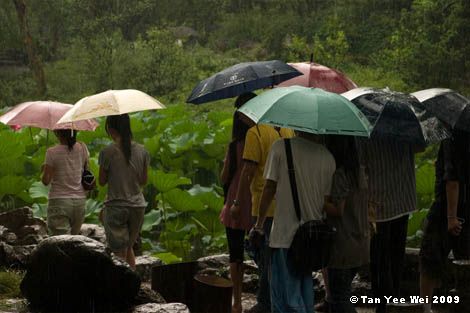
In the afternoon, it started raining. I hoped the rain would drive some of the visitors away, but most were well prepared.
Labels: China, photography
Tuesday, July 07, 2009
Old Shanghai (2)
On Sunday, I took a walk to another group of old buildings, this one located near the long distance coach terminal.
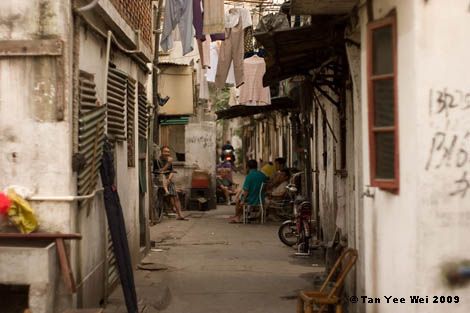
It is similar to the other area I visited previously, with quaintly crooked lanes, disorganised groups of houses and women washing vegetables along the lanes.

Click here for large size image
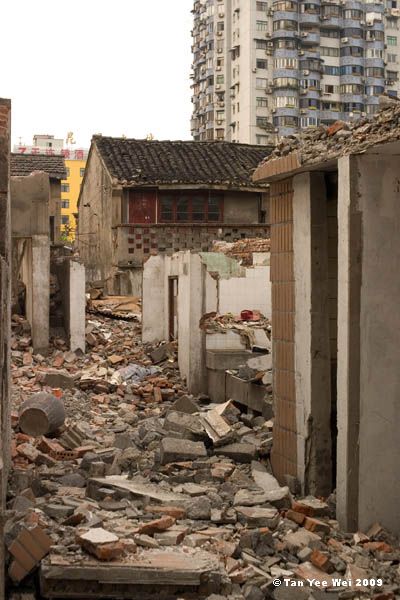
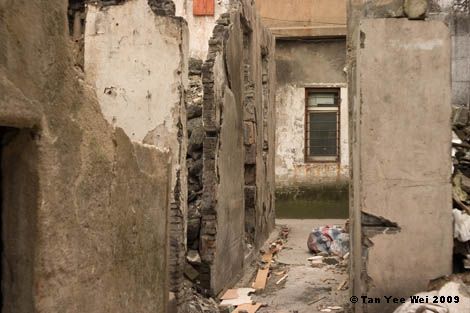
However, this area is earmarked for demolition. The process of evicting residents from their decades-old homes is common practice in Shanghai. The city government kicks everyone out and pays them a hefty sum to cover the astronomical cost of getting a new home, and these residents generally feel quite lucky to be able to get a free upgrade in housing.

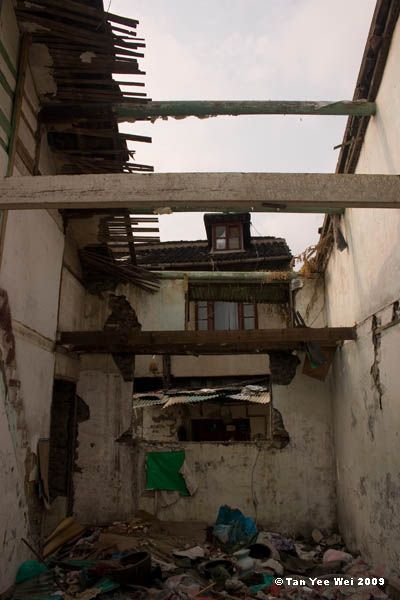
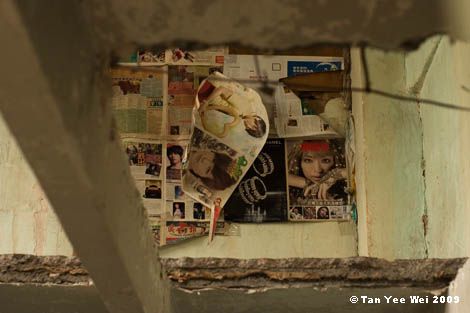
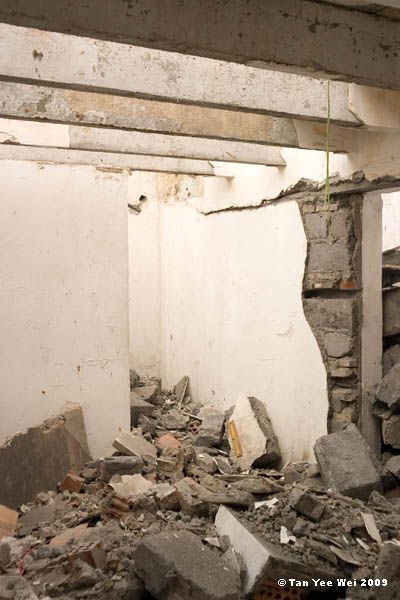
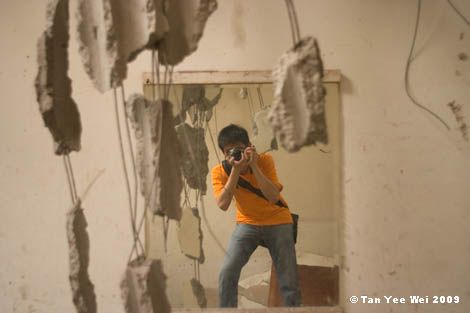
More than 2/3 of the buildings in the area have been made inhabitable. The roofing has been removed, the upper level floors completely smashed through, and everything of possibly any value has been scavenged. Roof tiles, window panes, doors, washroom fixtures, wooden stairs, electrical fixtures… everything that can possibly be reused has been taken away by successive scavengers. What remains among the standing structural members (these are too difficult to break without machinery) are huge chunks of concrete, masonry and other odd reminders that someone used to call this home.


Click here for large size image
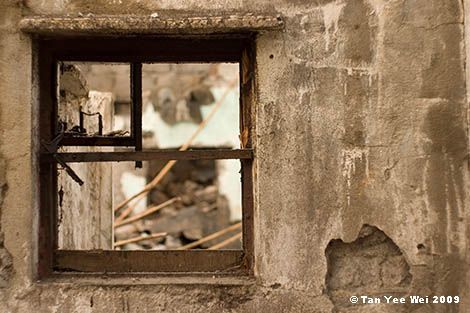
This used to be a kitchen- the window has a little square frame where an exhaust fan used to reside, and decades of hot oily air had deposited a film of disgusting black muck on the frames.

Click here for large size image


Click here for large size image

Click here for large size image
It is similar to the other area I visited previously, with quaintly crooked lanes, disorganised groups of houses and women washing vegetables along the lanes.

Click here for large size image
However, this area is earmarked for demolition. The process of evicting residents from their decades-old homes is common practice in Shanghai. The city government kicks everyone out and pays them a hefty sum to cover the astronomical cost of getting a new home, and these residents generally feel quite lucky to be able to get a free upgrade in housing.
More than 2/3 of the buildings in the area have been made inhabitable. The roofing has been removed, the upper level floors completely smashed through, and everything of possibly any value has been scavenged. Roof tiles, window panes, doors, washroom fixtures, wooden stairs, electrical fixtures… everything that can possibly be reused has been taken away by successive scavengers. What remains among the standing structural members (these are too difficult to break without machinery) are huge chunks of concrete, masonry and other odd reminders that someone used to call this home.


Click here for large size image
This used to be a kitchen- the window has a little square frame where an exhaust fan used to reside, and decades of hot oily air had deposited a film of disgusting black muck on the frames.

Click here for large size image


Click here for large size image

Click here for large size image
Labels: China, photography