Experiments in off-camera lighting strategies
After reading Strobist, I was sufficiently inspired to try out a few of the techniques discussed. With no flashgun of my own yet (a Nikon SB-25 will be shipped from Germany within the next few days; a wireless flash trigger is expected in a similar timeframe), I had to make do with a halogen incandescent reading lamp as my secondary light (instead of a strobe).
For this exercise, I borrowed a tabletop figurine from the housemate. A few of these figurines were rather scantily clad or posed in interesting positions. In the interest of photography and concentration, I picked the one with the most clothes on.
Side light:

Click here for large size image
The main light source is ambient light, in this case several overhead lights. This ambient lighting was very even and gave very little shadows, as the image above shows.

Click here for large size image
A diffuse secondary light was added on the left side of the camera, consisting of a halogen lamp’s beam directed to a sheet of white paper. The side light helps give depth to the image. In particular, a gentle shadow line is created along the subject’s face and sides facing the left are brighter. In this example, the texture of the clothes is clearly shown.
Note that by adding a sidelight to the subject, the subject is now illuminated by ambient lighting and the secondary light. However, the background is only lit by ambient light and is darker than the subject. Allowing the subject to be correctly exposed means the background is now darker than before.
Back light/ separation light:
Click here for large size image
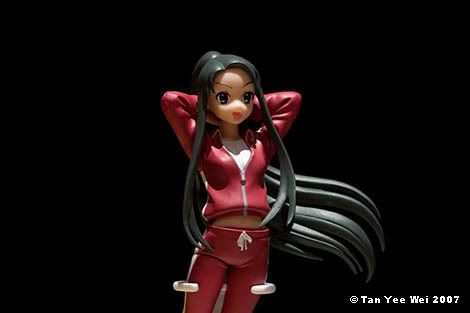
The main light in this case is also ambient light, but this time there happens to be a strong light overhead (note the shadows cast by the hair on the forehead).
Click here for large size image
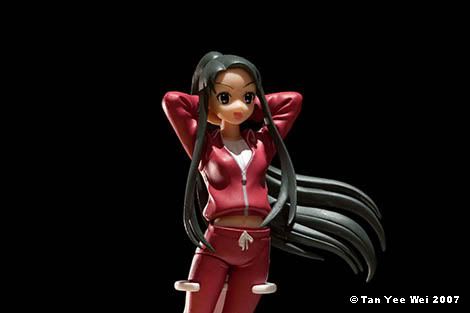
A secondary light was added on the left side behind the subject, located just outside the camera frame. This backlighting is visible on the left boundaries of the subject, effectively drawing a bright outline against the dark background.
Click here for large size image
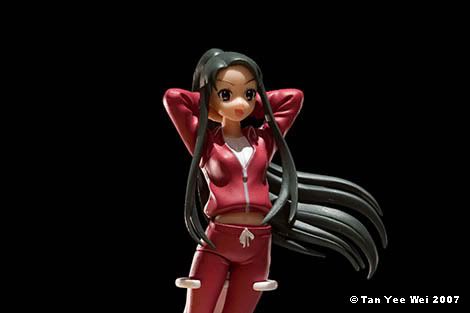
A reflector constructed of aluminium foil was placed on the right side of the subject, located just outside the camera frame. This creates additional outlining on the right side.
Adding the backlight and backlight reflector effectively separates the subject from a dark background. A dark subject can then be photographed in a dark environment while allowing the subject to stand out from its environment.
For this exercise, I borrowed a tabletop figurine from the housemate. A few of these figurines were rather scantily clad or posed in interesting positions. In the interest of photography and concentration, I picked the one with the most clothes on.
Side light:

Click here for large size image
The main light source is ambient light, in this case several overhead lights. This ambient lighting was very even and gave very little shadows, as the image above shows.

Click here for large size image
A diffuse secondary light was added on the left side of the camera, consisting of a halogen lamp’s beam directed to a sheet of white paper. The side light helps give depth to the image. In particular, a gentle shadow line is created along the subject’s face and sides facing the left are brighter. In this example, the texture of the clothes is clearly shown.
Note that by adding a sidelight to the subject, the subject is now illuminated by ambient lighting and the secondary light. However, the background is only lit by ambient light and is darker than the subject. Allowing the subject to be correctly exposed means the background is now darker than before.
Back light/ separation light:

Click here for large size image
The main light in this case is also ambient light, but this time there happens to be a strong light overhead (note the shadows cast by the hair on the forehead).

Click here for large size image
A secondary light was added on the left side behind the subject, located just outside the camera frame. This backlighting is visible on the left boundaries of the subject, effectively drawing a bright outline against the dark background.

Click here for large size image
A reflector constructed of aluminium foil was placed on the right side of the subject, located just outside the camera frame. This creates additional outlining on the right side.
Adding the backlight and backlight reflector effectively separates the subject from a dark background. A dark subject can then be photographed in a dark environment while allowing the subject to stand out from its environment.
Labels: photography
<< Home